Cinnamon Rolls

Rolls
3¼ cups America’s Test Kitchen flour blend or your favorite all purpose GF flour
1½ tsp xanthan gum (omit if your GF flour already contains it)
½ cup powdered buttermilk or regular powdered milk
2 tsp instant yeast (I use quick rise)
¼ tsp cream of tartar
¼ tsp baking soda
2 tbsp packed light brown sugar
1 tsp kosher salt
1 tsp apple cider or rice vinegar
2 tbsp unsalted butter, at room temperature
1 large egg, beaten
1½ cups warm water (about 95-110°, see notes)
Filling
4 tbsp unsalted butter
¾ cup packed light brown sugar (I usually end up using a little more)
1 tsp cinnamon (I don’t measure this, I just sprinkle on what looks like the right amount - depends on your taste!)
Glaze (optional) *See notes
½ cup powdered sugar
½ tbsp milk
¼ tsp GF vanilla
Spray 9 x 13 inch baking dish with GF baking spray or line with parchment paper & set aside.
In the bowl for your mixer combine GF flour, xanthan gum, buttermilk powder, yeast, cream of tartar, baking soda, & brown sugar. Whisk (by hand or with whisk attachment on mixer) until well combined. Whisk in salt until combined.
Using the paddle (not whisk or dough hook) on mixer add butter, vinegar & egg. Mix until well combined. With mixer on low, slowly pour water into dough & mix in. Then turn mixer to high for about 3 minutes (I find it takes about 5 minutes) until the dough is moist & starts pulling away from mixing bowl in places.

Turn dough onto surface lightly dusted with GF flour. Sprinkle dough with a little GF flour & knead in gently until it is smooth. (It may still be a little sticky.)


Divide dough in half, covering one half with towel to prevent it from drying out. Using a lightly floured rolling pin roll dough to about ½ inch thickness & about 9x12 inches. (Just a little smaller than the baking dish you have prepped.)
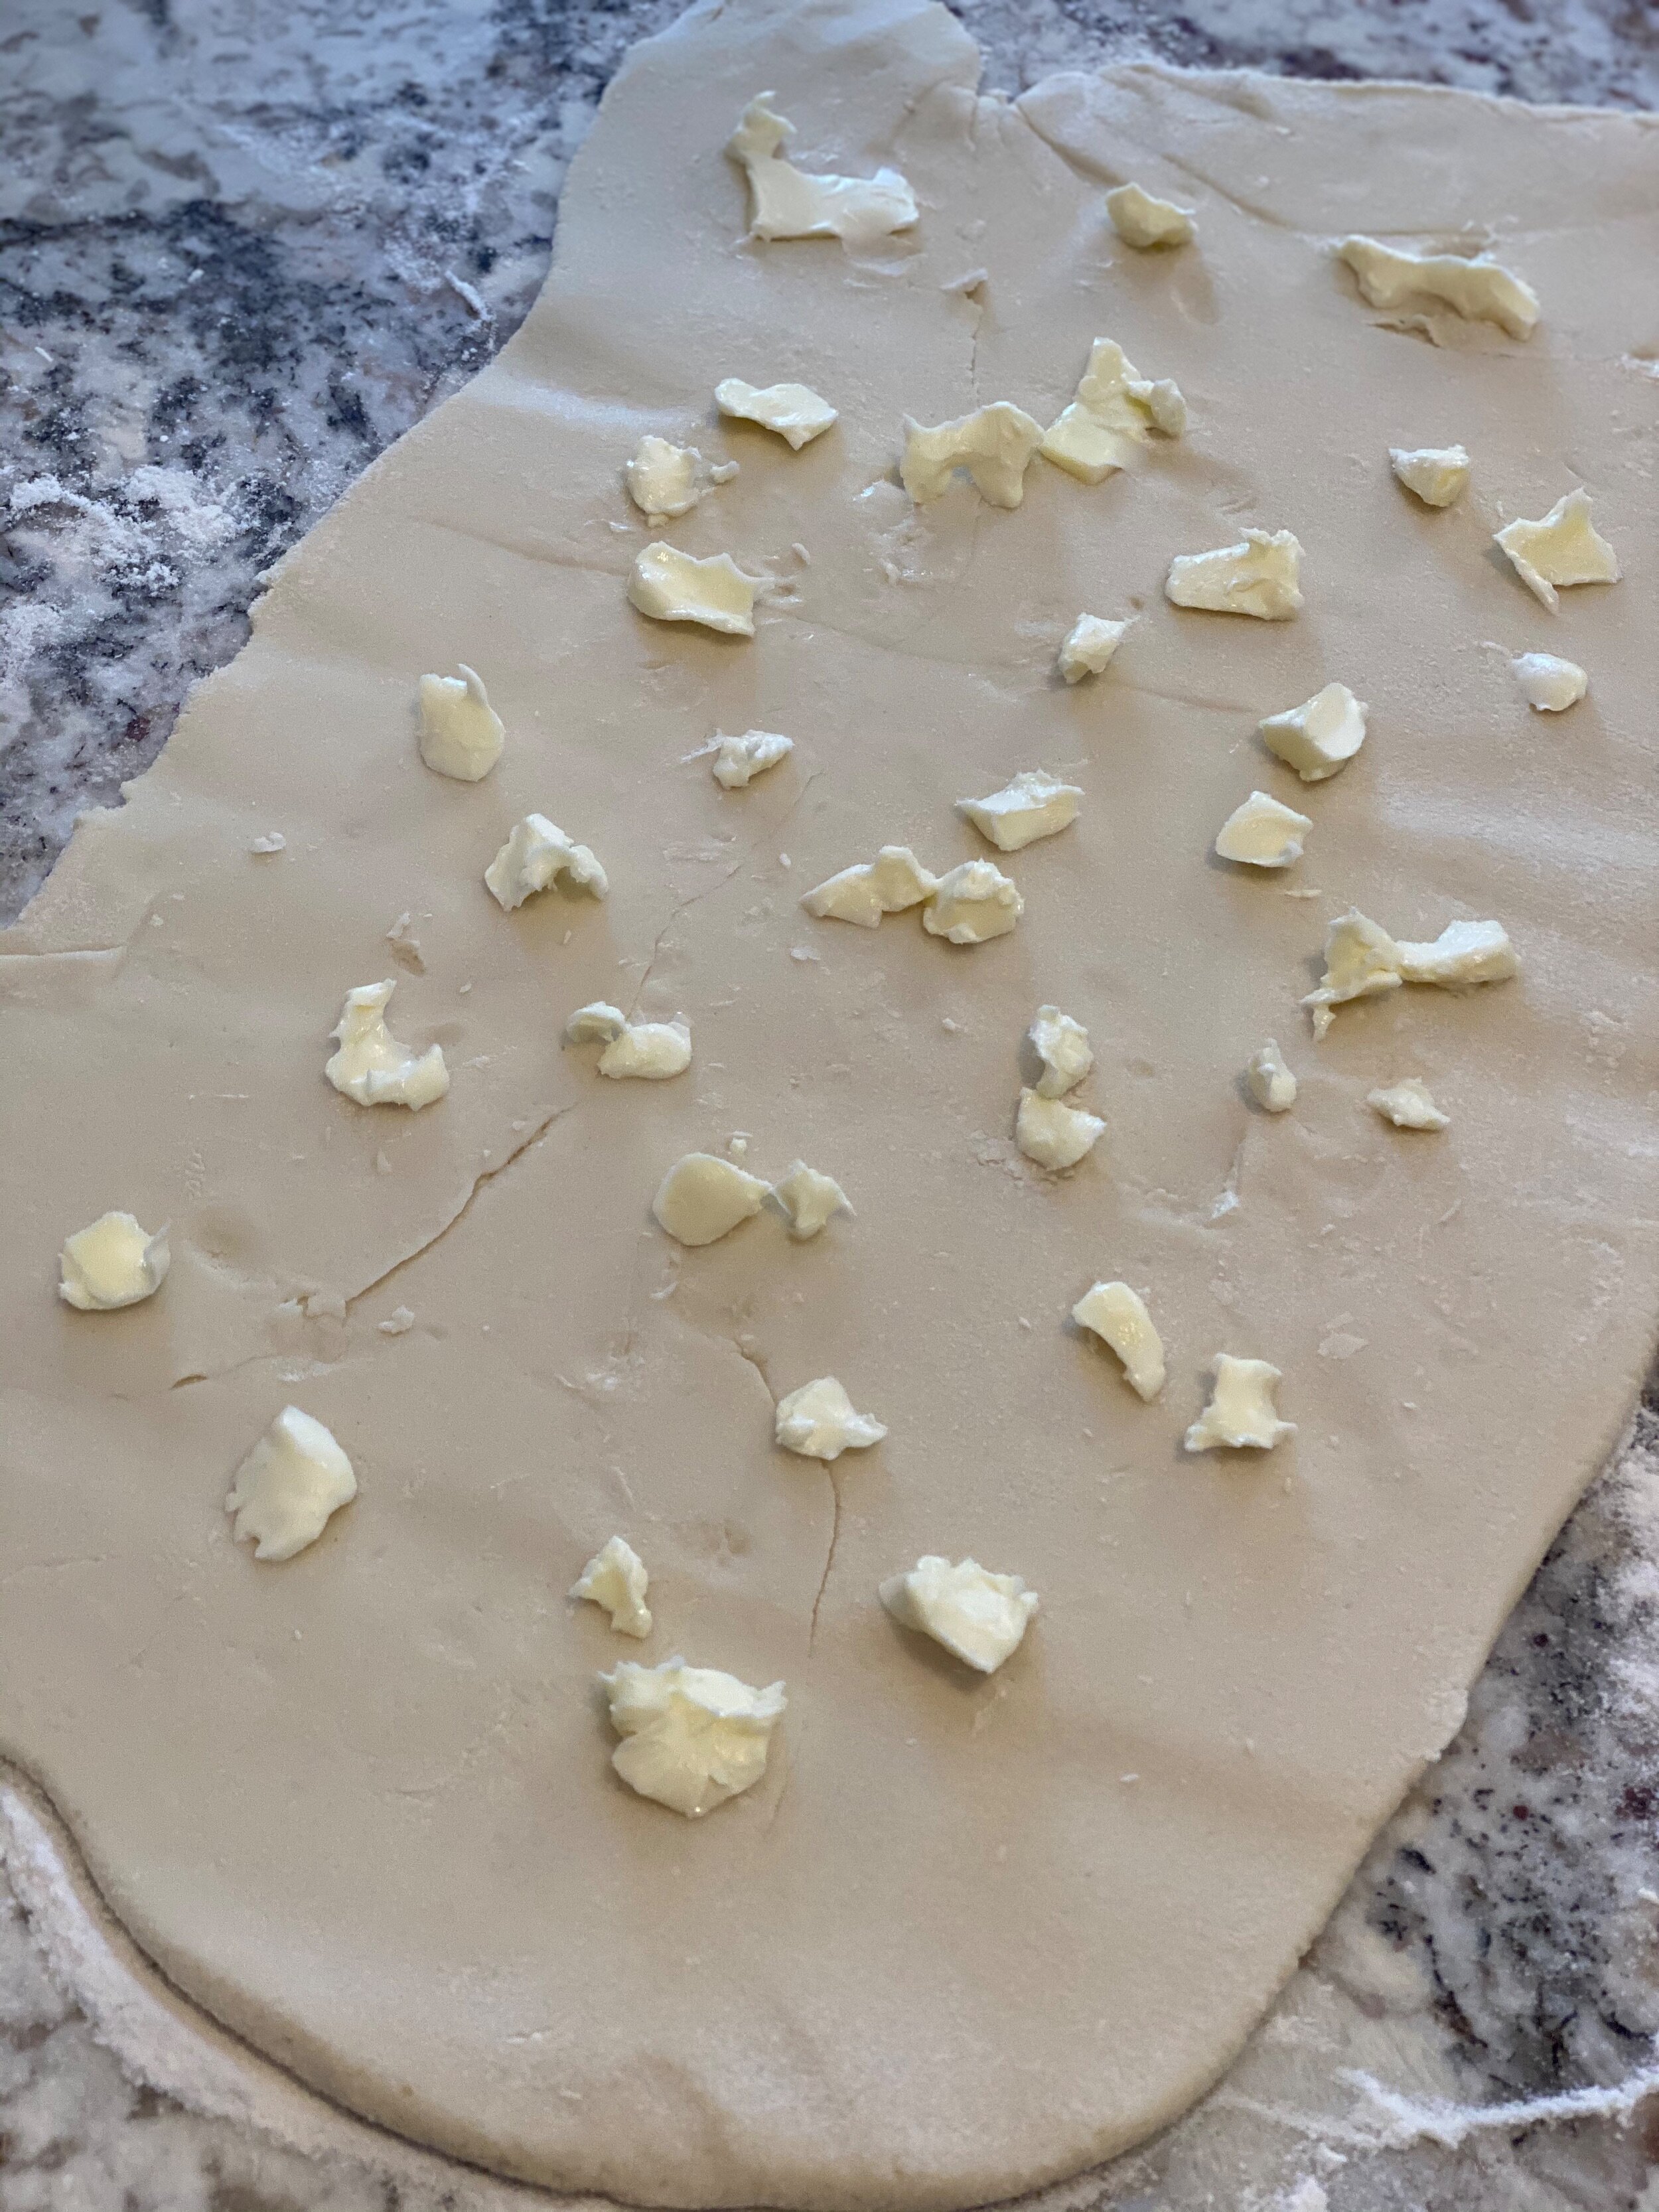
Spread the rolled dough with 2 tbsp room temperature butter, stopping about 1 inch from the edge on all sides. (I find the dough a little delicate & spreading the butter like you would on a sandwich doesn’t always work well. So, I just try to break up the butter into small pieces by hand & distribute it over the rolled out dough.)
Sprinkle ½ of the brown sugar evenly across the dough & gently pat it down on the butter. Then sprinkle ½ of the cinnamon over the brown sugar.

Starting on either short side, roll the dough as tightly as you can into a coil. Using a sharp knife, slice the roll into 2 inch wide sections. Place the cross sections into the prepared pan so you can see the filling swirl. (The original recipe calls for them to be about 1 inch apart, then compress them about 1/3 of the way down. But I found that after rolling the second ½ of the dough, that the entire baking dish was filled!)

Repeat the process with the second ½ of the dough. Cover the baking dish with plastic wrap that has been sprayed with just a little GF baking spray. Then cover the whole thing with a dish towel. Put the rolls in a warm, draft-free place to rise by about 150%, or about 1 hour or so.
Remove the dish towel & plastic wrap & bake at 350° for 25-30 minutes until the top is golden brown & the rolls are cooked in the middle. (They should feel kind of springy when you gently tap on them.)
Remove the rolls from the oven & place the baking dish on a wire rack to cool.

If you chose to use the glaze, in a small bowl or liquid measuring cup, mix together glaze ingredients. You can use a whisk or spoon to stir them together It should be thick, but still able to be poured over the rolls. If it’s too thick, add more milk ¼ tsp at a time & if it’s too thin, add powdered sugar 1 tsp at a time until you get the consistency you want.
Notes:
This recipe is based on a recipe from the gluten free on a shoestring website. Thanks Nicole!
https://glutenfreeonashoestring.com/gluten-free-cinnamon-rolls
I think I may have rolled my dough a little thinner than is called for as I got 18 rolls instead of 12! Her rolls also came out much more symmetrical than mine (haha). But I really like this recipe - it’s so easy! And the rolls are really good!
I don’t use a thermometer for the warm water. But it does need to be warm enough to activate the yeast. I test the temperature on my inner wrist - it should be about as warm as you would heat a baby’s bottle to. So, pretty warm, but not hot! But if you’re not sure, just use a thermometer.
My kitchen tends to be a little chilly when I don’t have the oven on. So, when it’s time to let the rolls rise, I turn the oven on to 200° & set the baking dish on top. This makes a nice warm space where the rolls can rise.
These are so tasty, I can never wait until they are completely cool! I pour the glaze over them when they are still warm (but not hot out of the oven). They will be a little messier – but are so delicious it’s worth the mess when you can eat them while they’re still warm! Although the glaze is optional, neither the rolls or the glaze are super sweet, so I always opt to use it. The original recipe calls for twice as much powdered sugar & milk, & no vanilla. But I prefer the glaze to be just drizzled on the top, not spread on like frosting. But everyone has their own preference, so make them the way you like!